Waves are transparent to waves
Waves are transparent to waves
Introduction
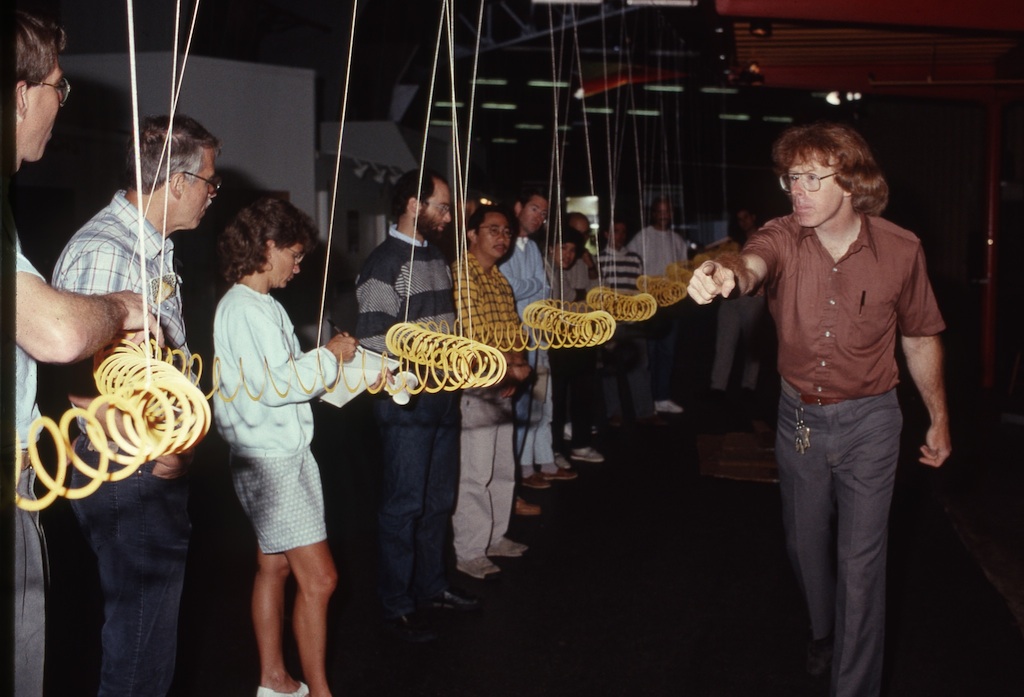
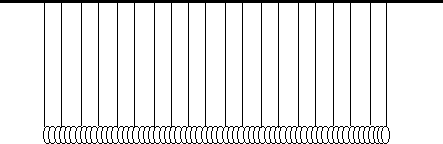
A slinky hung from strings can be used to show how standing waves arise as the combination of two traveling waves. On a string of fixed length only standing waves which have an integer number of half wavelengths will grow in resonance leading to the pattern of resonant frequencies known as harmonics.
Material
Two plastic slinkies
Braided fishing line (50m) at least 20 pound test
Heavy nylon or dacron cord 10 m (5 to 10 mm diameter)
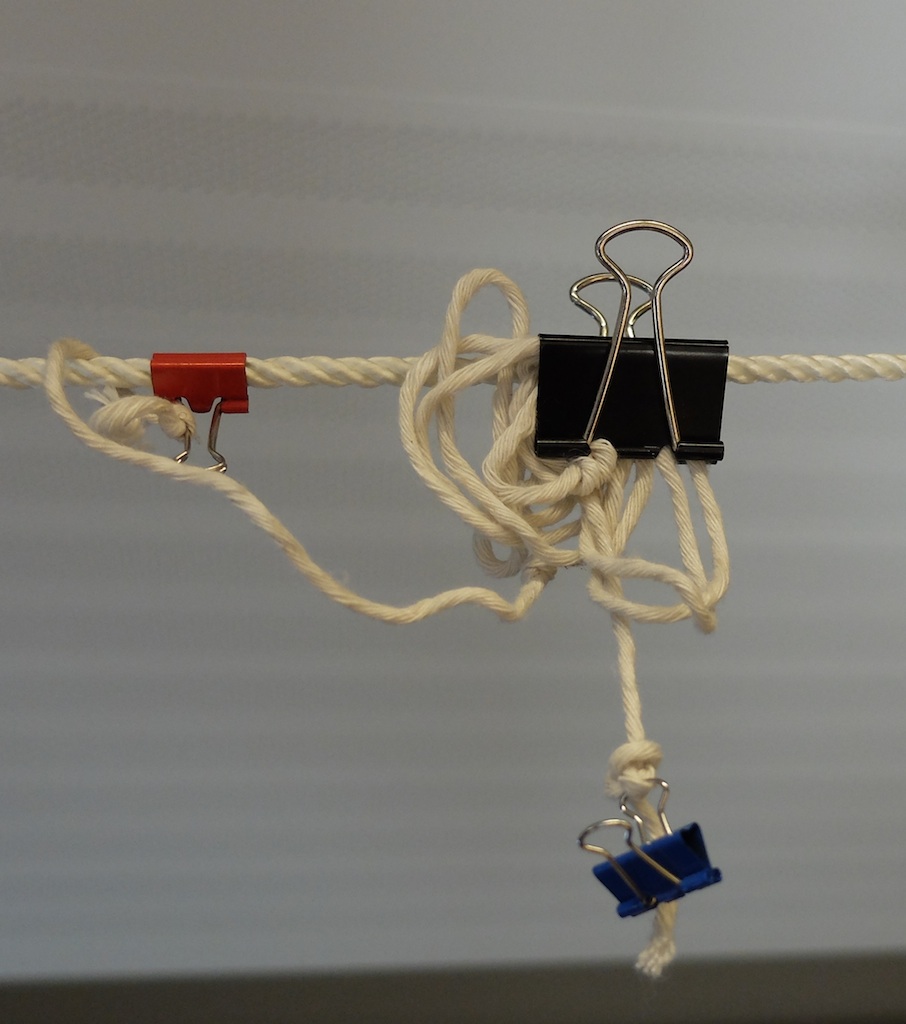
24 small binder clips which will just fit over the heavy cord
24 more small binder clips which will clamp onto the
slinky
Optional 24 medium binder clips to clip each suspension cord into place for storage
Assembly
A double length slinky is best. You can glue two plastic slinkies together. Glue two plastic slinkies together by overlapping their ends by about 2 inches and using Gooptm or other strong plastic adhesive.
Tie the cord tautly between two sturdy supports. Hang it at least 2 m above the floor
Cut 24, 1.5 meter long pieces of fishing line.
Melt the ends in a candle to prevent fraying.
Tie each length of fishing line to one of the metal loops on a binder
clip.
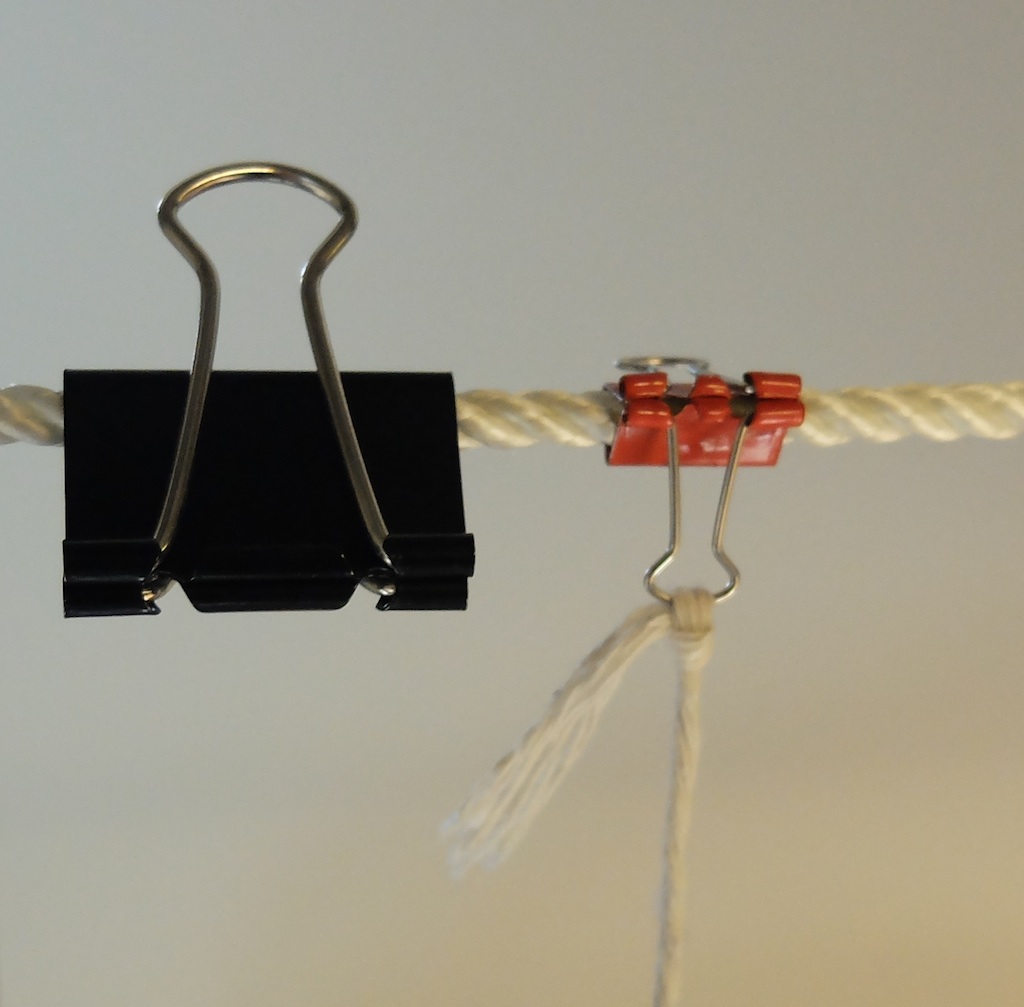
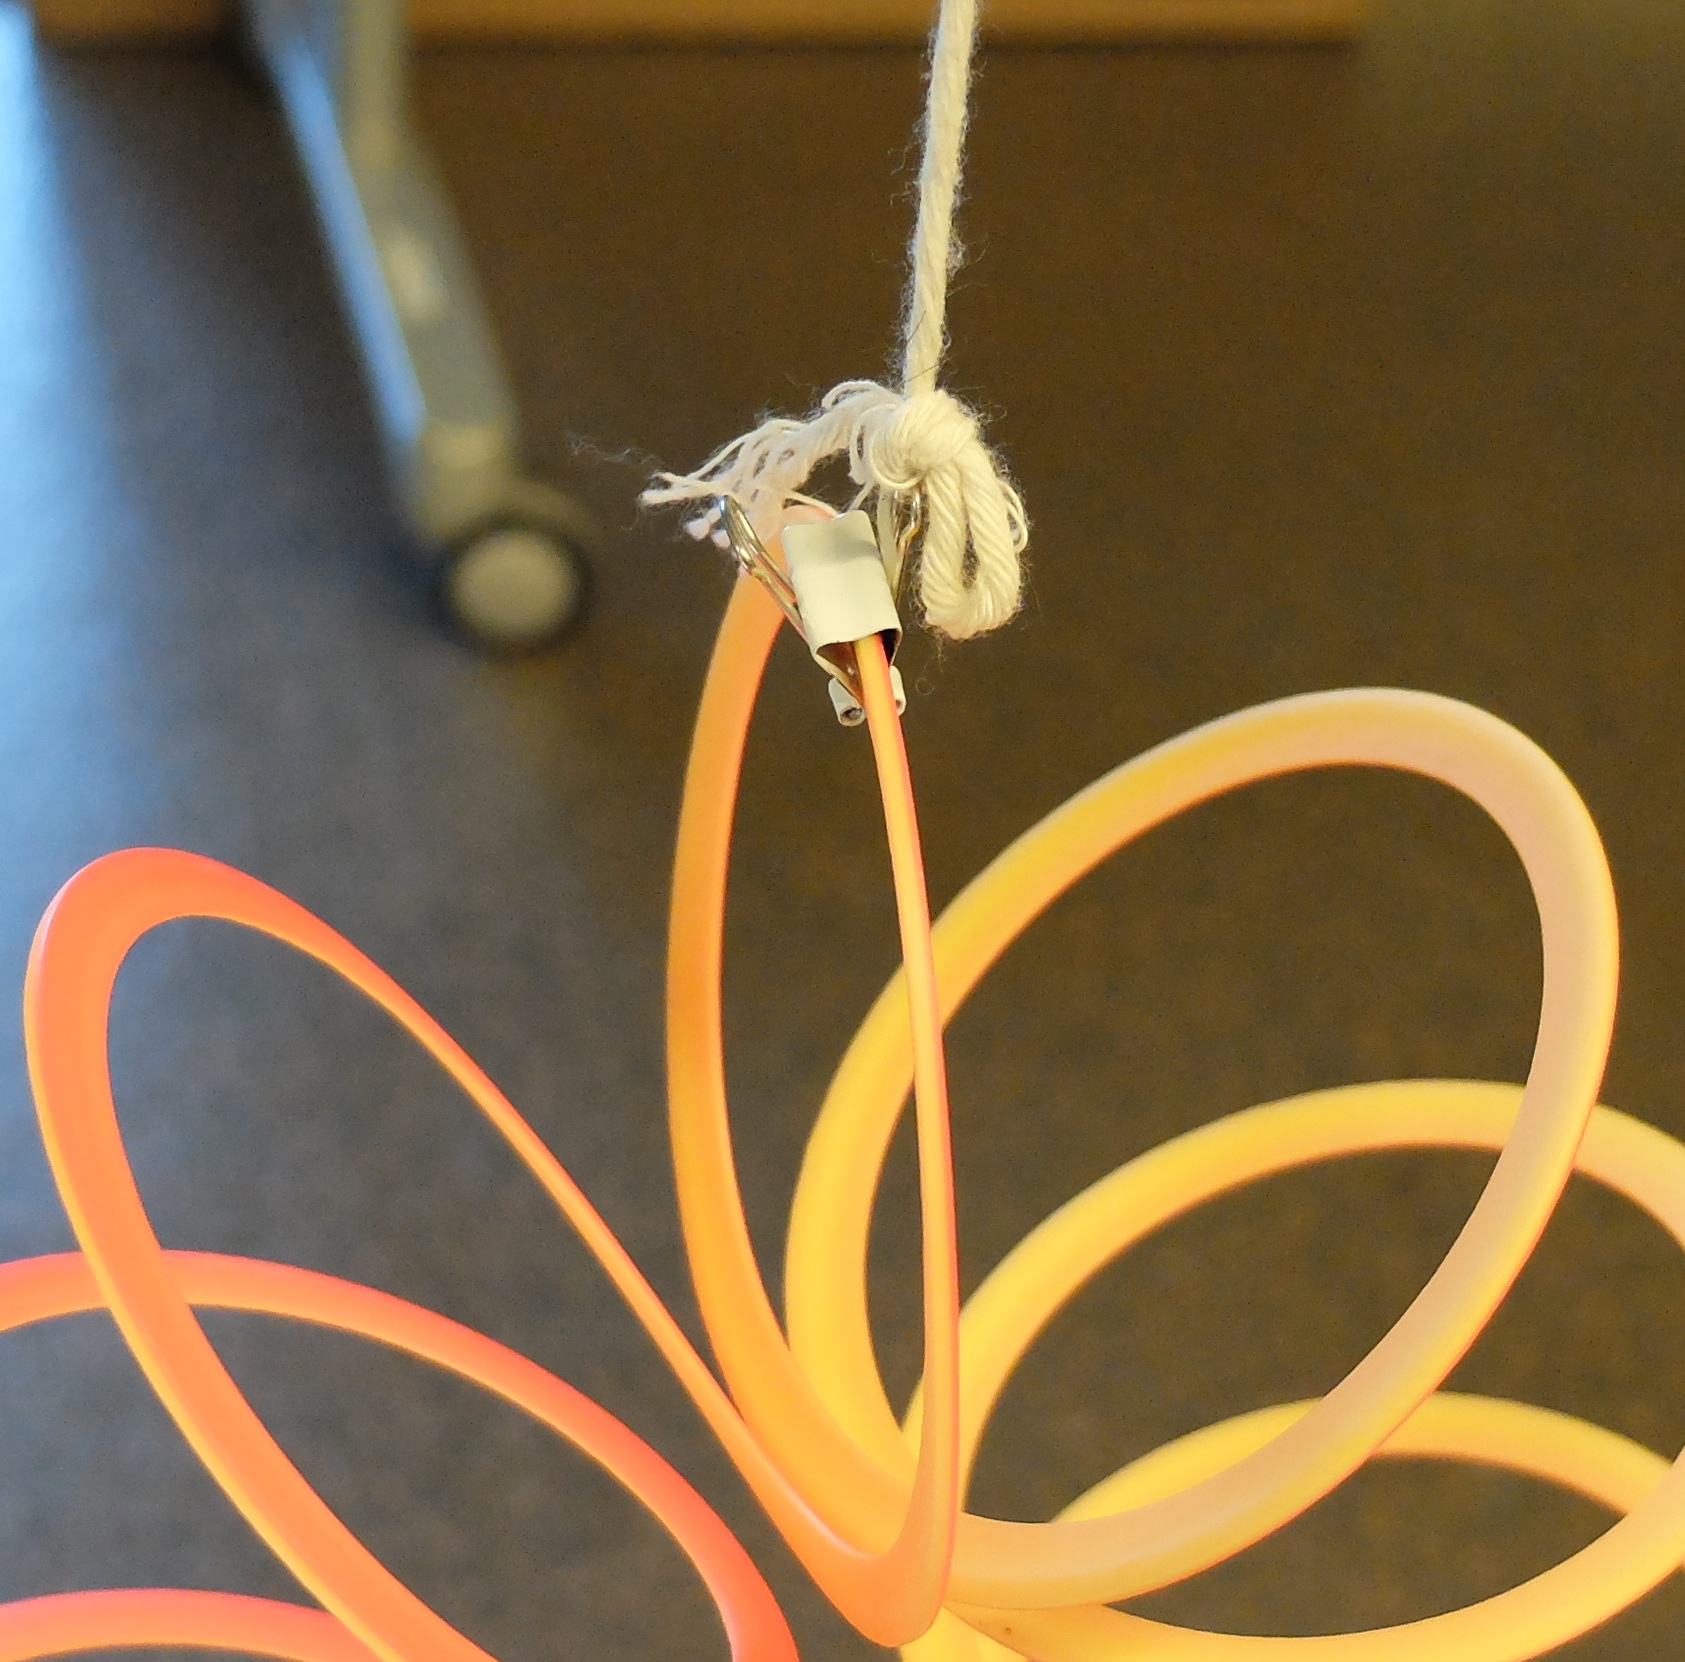
The upper binder clip is clamped to the cord. A string is tied to one of its legs. The string runs down 1.5 meters to the slinky. The lower binder clip is clamped to the slinky. Adjust the height of the slinky. Run part of the string between the clip and the slinky so that
it is pinched in place at the correct length.
Clip the binder clips to the heavy cord about 0.3 m apart. Use the
other binder clips to clamp the free end of the strings to the
slinky. Tie one leg of the bottom clip to the support string. Clip the slinky to a support string every 8 turns of the slinky. Adjust the lengths of each support
string so the slinky hangs in a nearly straight line, squeeze the
handles of the binder clips and the the strings will slide up and
down easily between the binder clips and the slinky. Release the
handles of the binder clips to hold the strings in place.
We use binder clips instead of tieing knots to connect the support strings to the main support cord and the slinky because they can be easily unclipped to fix inevitable tangles.
For storage that prevents tangles use a medium size binder clip to clip each coil of string to the main support cord.
To do and notice
Fix one end of the slinky by tying it to a
support. Or have a person hold it.
Hold the other end in your hand.
One pulse studies
Send a pulse down the slinky.
Move the end of the slinky rapidly to one side and back.
Notice:
the wave pulse propagates down the slinky
the pulse reflects from the distant fixed end.
the pulse flips over when it reflects
The pulse gets smaller as it travels.
Send high amplitude pulses and low amplitude,
send short period pulses and long period.
Measure the speed of the pulses by timing how long it takes them to
travel down the length of the slinky, or down and back. Do it with a
stopwatch or do it by counting the rhythm of the pulses each time
they arrive at your hand, count aloud 1,2,3,4 as the reflections
return to your hand.
Notice that the speed of all of these pulses is the same regardless
of amplitude or period.
Free the far end.
Put a person at each end.
Have each person send pulses down the slinky.
Notice the pulses when they “collide.”
Notice the pulses pass through each other.
Have one person send a short period pulse or a double height pulse and the
other send a long period pulse.
Have each person send a pulse to the same side, e.g. to the east.
Notice, how the pulses sum to a larger pulse as they pass through
each other.
Send pulses to opposite sides. Notice how they “add” and so
cancel as they pass through each other.
Have a person hold a hand to one side of the center of the slinky. A
single pulse to that side will hit the hand. Try to send two opposite
pulses so they cancel at the position of the hand, so that both
pulses go passed the hand but neither hits it.
Tie one of the free ends to a light string a few
meters long,
or tie a split ring to one end of the slinky and then put a tight
slippery line such as nylon monofilament through the slip ring. (the
monofilament should be stretched horizontally.)
Send pulses down the slinky notice that they
reflect without inverting.
Watch carefully during a reflection and notice that the pulse
amplitude doubles in the middle of the reflection.
So What
The side-to-side pulses are transverse pulses.
Two most important observations
1. The pulses travel at the same speed regardless of period or amplitude.
2. Pulses pass through each other without changing. As they pass through each other they add together, this is called superposition of waves.
Pulses and energy
A pulse has two forms of energy: kinetic energy in its side-to-side velocity and potential energy in its deformation.
A released bulge travels in two directions a traveling pulse in one.
If you use your hands to shape a stationary bulge to one side in the middle of the slinky, then release the bulge, then two pulses travel, one in each direction.
A pulse reflecting from a free end doubles in height.
A pulse traveling along the slinky is pulled back
toward a straight line by the slinky in front of it and behind.
When a pulse reaches a free end, the sideways motion is pulled back
by a slinky only on one side. Free of the double pull, the pulse
doubles its amplitude and reflects uninverted.
Another way to look at the reflection is that to make the double
height pulse at the open end a mythical pulse comes into the open
end, adds to the original pulse, and continues on as a reflected
pulse in the same direction.
A pulse reflecting from a fixed end inverts
When a pulse collides with a fixed end the wall
exerts forces on the slinky which keep the end from moving.
Another way to look at this is that an inverted pulse comes out of
the wall canceling the incoming pulse at the wall. The forces exerted
on incoming pulse by the wall are identical to the forces produced by
an inverted pulse traveling out of the wall. As a result the pulse
reflects inverted from a fixed end.
Waves traveling and standing
Traveling Waves
To do and Notice
Have people hold both ends of the slinky.
One of them sends a wave, a series of right and left oscillations of
the end of the slinky
Make waves which are high frequency and low
frequency,
Notice that high frequency waves have short wavelengths, and low
frequency waves have long wavelengths.
Digital model of a wave, send a short pulse wait and send another
short pulse. The longer the wait the greater the distance between the
pulses. Since the first pulse keeps moving away during the
wait.
What’s Going On?
The amplitude of a wave is independent of its
frequency.
For sound high frequency is heard as high pitch, for light high
frequency visible light appears bluish.
High amplitude sound waves are louder, high amplitude light waves are
brighter.
The speed of a wave is independent of its frequency and
amplitude.
There is a relation between the frequency of a wave and its
wavelength. Picture generating a wave crest, this crest travels away
from you with a constant speed. If you generate a second wave crest a
short time later, as you would in a high frequency wave, then the
first crest has not had time to move very far before the second
crest. The high frequency wave thus has a short wavelength. Carry
through this argument yourself for a low frequency wave.
The low frequency wave will have a longer time between crests and so
the first crest will have moved farther at its constant speed
creating a longer wavelength.
Math Root
The equation for wavelength given speed and
frequency is
v = L * f where L = wavelength, m, v = speed, m/s, f = frequency,
Hz
alternately
L = vT, where T is the period between two pulses or the period of a
wave.
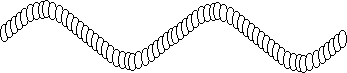
Standing waves
Send 4 to 6 high frequency waves down the slinky,
watch them travel and reflect from the far end. Notice that after
reflecting they continue to travel back toward the sender and then
reflect once more from the sending end.
Notice that as the reflected wave passes through itself a
standing wave is created! A standing waves appears to stay in
one place and oscillate from side to side, it does not appear to
travel.
Any frequency wave you send will create a standing wave at both ends
of the slinky as the reflected wave passes through the incoming part
of itself.
Have the people at both ends of the slinky send 4 to 6 wave crests toward each other. Have them synchronize their hand motions to send waves of the same frequency and amplitude. Notice that as the waves collide in the center of the slinky, a standing wave is formed.
Continuously move your hand and send out a wave.
As this wave reflects through itself a standing wave is created. Feel
the reflected wave as it arrives at your hand. At certain
frequencies, small amplitude motions of your hand create a large
amplitude standing wave. At these frequencies an integral number of
half waves fit on the slinky exactly.
You can view these frequencies as happening when the standing waves
at one end of the slinky exactly match up with the standing waves at
the other end.
Move your hand back and forth slowly to create a
single back and forth oscillation, one hump or half a wave. Search
for the frequency of your hand motion which creates the largest
motion of the slinky for the smallest motion of your hand. This is a
resonant frequency, where one half a wave fits onto the length of the
slinky.
Speed up your hand motion and create a two hump, one wavelength
pattern on the slinky. Search for resonance where the largest slinky
motion results from the smallest hand motion.
Notice the point in the middle of the slinky where there is no
motion. This point is called a node. The one hump pattern had no
nodes in the slinky (It does have two nodes, one at each end of the
slinky.)
Speed up your hand even more to create a pattern with three humps,
one-and-a-half wavelengths, and two nodes.
Then try for four humps.
What’s Going On?
The reflected wave has the same frequency and
amplitude as the incoming wave.
Two waves of the same frequency and amplitude but traveling in
opposite directions add together to produce a standing wave.
Thus a (single sinusoidal) wave and its reflection will always
produce a standing wave at one end of the slinky.
The back and forth period of the standing wave is the same as the
frequency of either of the two colliding waves.
The wavelength of the standing wave is the same as the wavelength of
each traveling wave.
The resonant standing waves occur only when the
standing waves established at each end overlap so that their nodes
occur at the same places. This only happens when:
there are nodes at both ends and none in the middle,
or when there is another node in the center,
or when there are two nodes 1/4 of the way from each end,
and so on.
Thus while standing waves can occur for waves of any frequency at a
one-ended slinky, they can only occur with certain select frequencies
on a slinky with two ends.
In the pattern with a node in the middle, how does the motion get through the node? Of course, the standing wave is made from traveling waves which travel through the node but you cannot see the traveling waves. What you can see is two types of motion, the side to side motion, of which there is none at the center node. But there is also a rocking motion. At the center node a segment of the slinky rocks back and forth even though the center doesn’t move to the side.
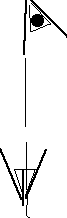
![]()
A slink at a node marked by a black circle, does not move side
to side,
However, the slinky does rock back and forth the most about this
node.
A node of motion is an antinode of rocking.
If you hold the slinky at two points near the center to prevent rocking as well as side-to-side motion then the wave will not pass through the center and will die away on the far side. (As an aside if you pin down the node in the center by holding it between two stretched rubber bands so it can rock but not move side-to-side the wave will continue on both sides of the node. Attach one rubber band to the top of one slink and the other one to the bottom.
The nodes of motion are at the places where the rocking motion is maximum, called antinodes of rocking. The nodes of rocking occur at places with maximum side-to-side motion, at antinodes of motion.
In general when we say node or antinode we are using a shorthand which means nodes of motion, if we want to discuss a node of rocking we must say all the words, "nodes of rocking."
A sound wave can be viewed as a wave of motion, or as a wave of pressure. The motion in the sound wave is like the motion on the slinky while the pressure in the sound wave is like the rocking of the slinky. In sound, where motion is the greatest the pressure changes are the least.
A fixed end is a node of motion and an antinode of rocking. A free end is a node of rocking and an antinode of motion.
|
Scientific Explorations with Linda Shore and Paul Doherty |
|
17 July 2001 revised 18 Sep 2015 |